For best results when using Smyle Mouse head mouse, please read the information below and follow the recommendations.
Smyle Mouse tracks the user’s facial gestures via a webcam and translates them into mouse cursor motions on the screen. It also allows the user to click by smiling or dwelling. For all these features to work well Smyle Mouse needs to be able to see your facial features reasonably well. Therefore the webcam you use with your computer is a critical factor in determining how well Smyle Mouse will perform. Having said that, Smyle Mouse’s requirements for a webcam are pretty simple.
When you start Smyle Mouse, it will prompt you to choose your camera.
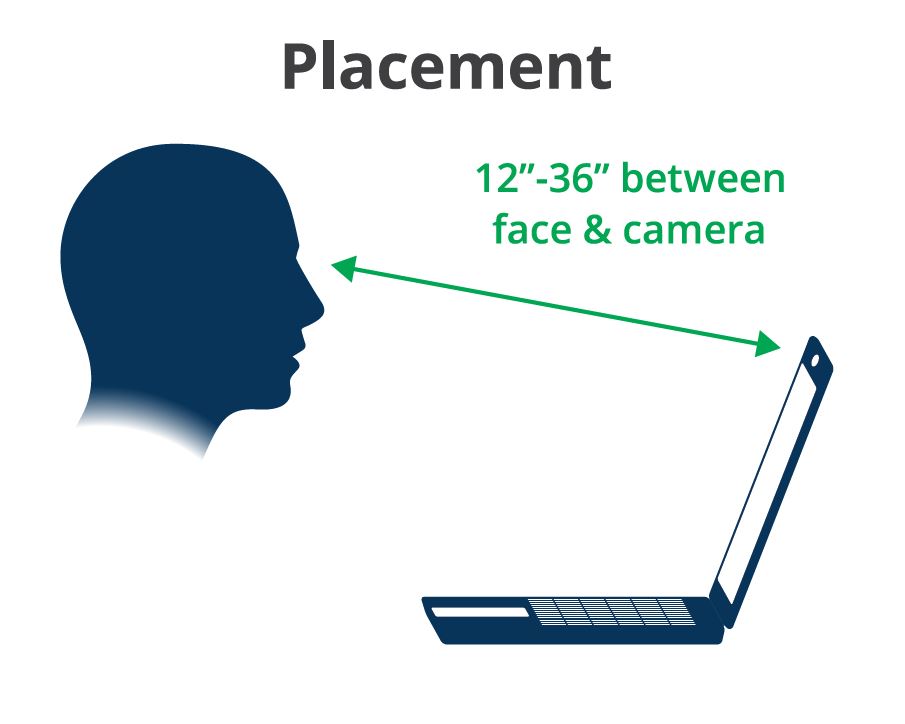
Akin to normal working situations, it is recommended for the user to be about an arms length away from your camera. That translates to a distance of about 18 to 36 inches. Having said that, user can adjust Smyle Mouse’s settings to be placed as far away as 100 inches from the camera. See Page 16 of user documentation here.
For best results, keep the camera to be at about the eye level. Also place the camera such that it is generally in the direction of your monitor when you face it.
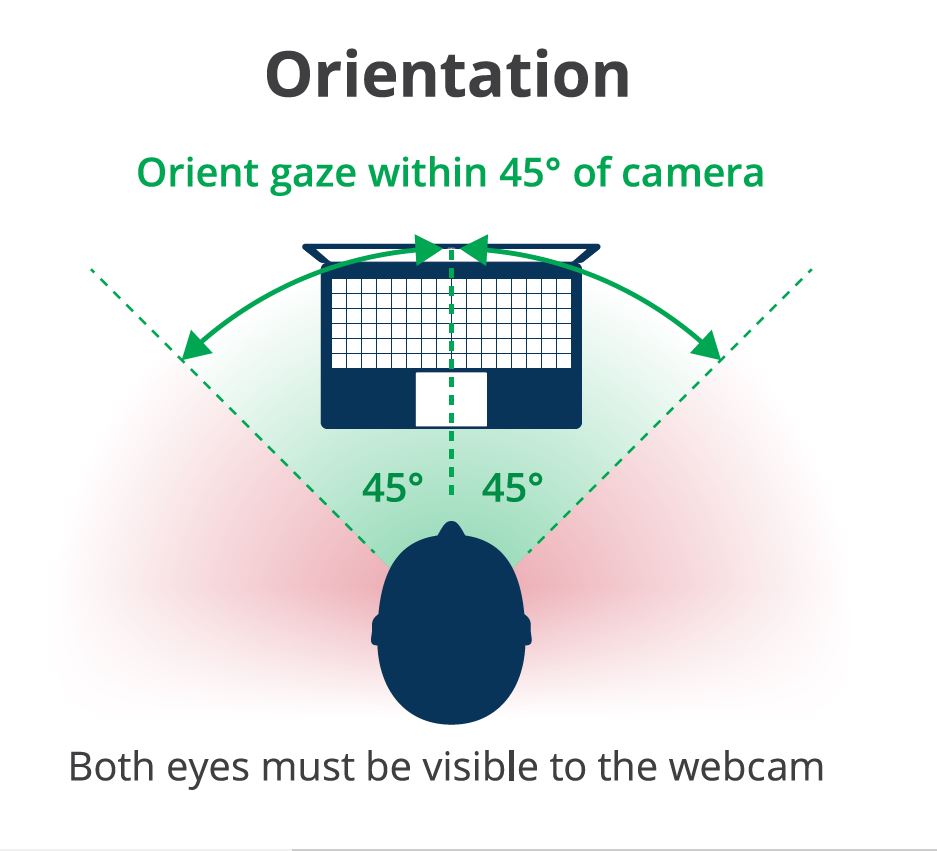
Try not to turn your face more than 45 degrees away from the camera. Remember that Smyle Mouse needs to see both your eyes, especially if you will be using smile clicking. If you are using dwell clicking, you can turn your head through a wider range.
After choosing your camera, Smyle Mouse will start the calibration process. This is needed to calibrate your smile. Try to keep your head steady when smiling. It is important to smile moderately during calibration — no too much or too little. Smiling too big during calibration with cause Smyle Mouse to expect the same level smile during usage, which may get tiring. On the contrary, if you smile too little, every little twitch of your lips could be misinterpreted as an intent to click using your smile.
Here is the main user interface, presented in the Main Window. Please note that this window can be minimized and hidden away so that you can use the entire Windows desktop.
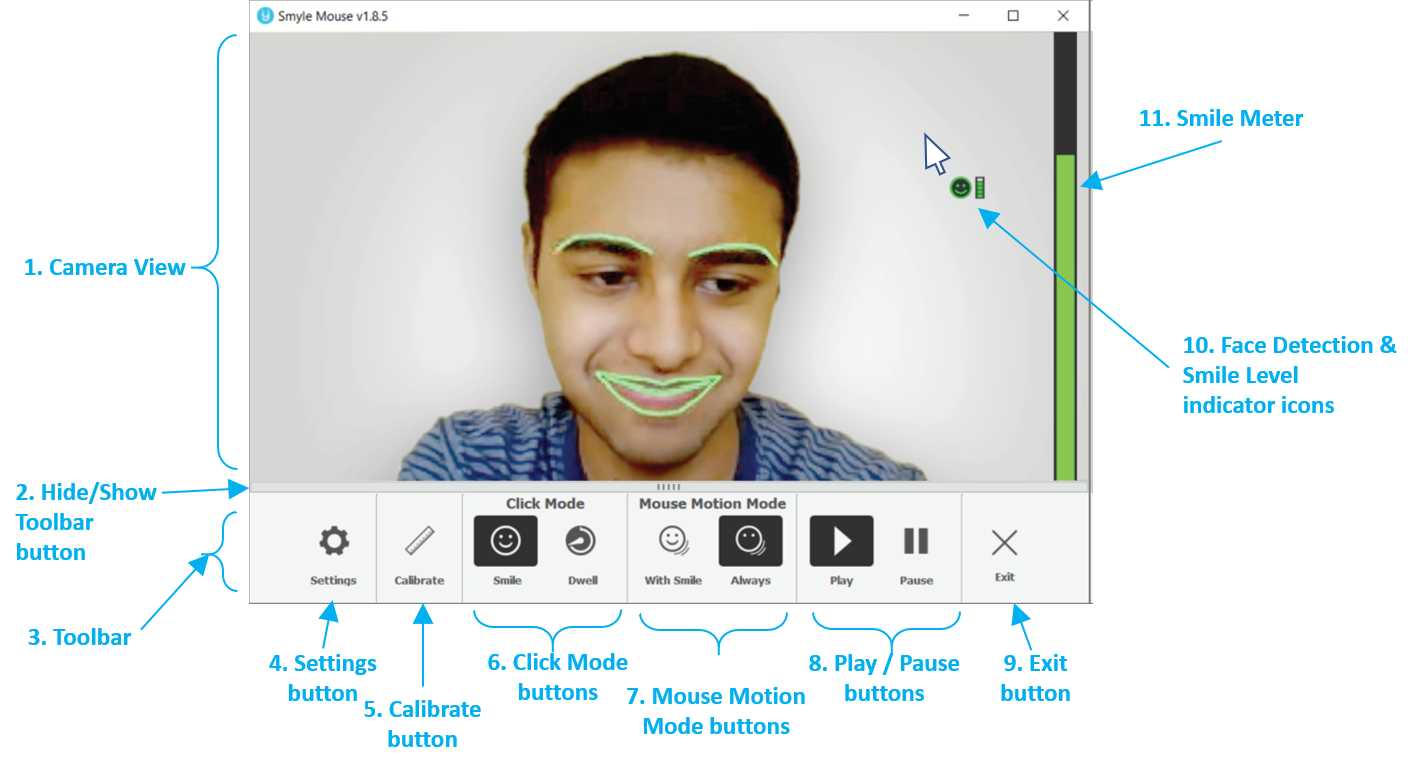
Smyle Mouse highlights your facial features in green or pink to let you know that it is able to read your gestures well. However, if you are too far away from the camera or if you turn away from it or the lighting condition is not optimal, it will turn those highlights bright red. If you get bright red highlights, please try to improve the situation for better performance.